Setting up a fully remote development environment: a tutorial
This tutorial will guide you through a solution of creating a remote development environment. This is particularly useful for remote working (e.g. with a remote PC using a laptop), cloud computing (within a virtual container), and many other scenarios.
Prerequisites
Knowledge of these great tools would be very helpful:
- SSH command lines. It’s the backbone of everything.
- A terminal multiplexer, Tmux, GNU Screen, etc. They are useful for controling remote sessions.
- A text editor, or an IDE with remote support. For example, VS Code (with Remote SSH extension), Emacs (Tramp mode), or even Jupyter Lab.
- The remote machine is supposed to be running a Debian-based Linux distro (e.g. Ubuntu).
- The local machine, usually a laptop, can run any mainstream operating system.
1. Install and enable SSH on remote server
First of all, you need to verify if an SSH server is running on the remote machine. To do this, open a terminal on the remote machine and type the following command:
1 | sudo systemctl status ssh |
The output should tell if the SSH service is running. If this is the case, jump to the next step of this tutorial. Otherwise you need to install the openssh-server package:
1 | sudo apt update |
Once the installation is complete, the SSH service should start automatically.
Ubuntu ships with a firewall configuration tool called UFW. If the firewall is enabled on your system, make sure to open the SSH port:
1 | sudo ufw allow ssh |
To disable the SSH server on your Ubuntu system, type:
1 | sudo systemctl disable --now ssh |
To re-enable it, you can use:
1 | sudo systemctl enable --now ssh |
2. Configure router with port forwarding
You can probabliy skip this step if you work in a company as IT support should have done the job. But if you wish to connect to a home machine over the Internet, you will need to configure the router.
Each router has a different way to setup port forwarding, then you should consult the router manuals to learn how to do it. In general there are two things that need to be done:
- Enter the port number where requests will be made (Default SSH port is 22);
- Enter the private IP address of the server PC. To find the private IP address, type the command:which will print something like this:
1
ip a
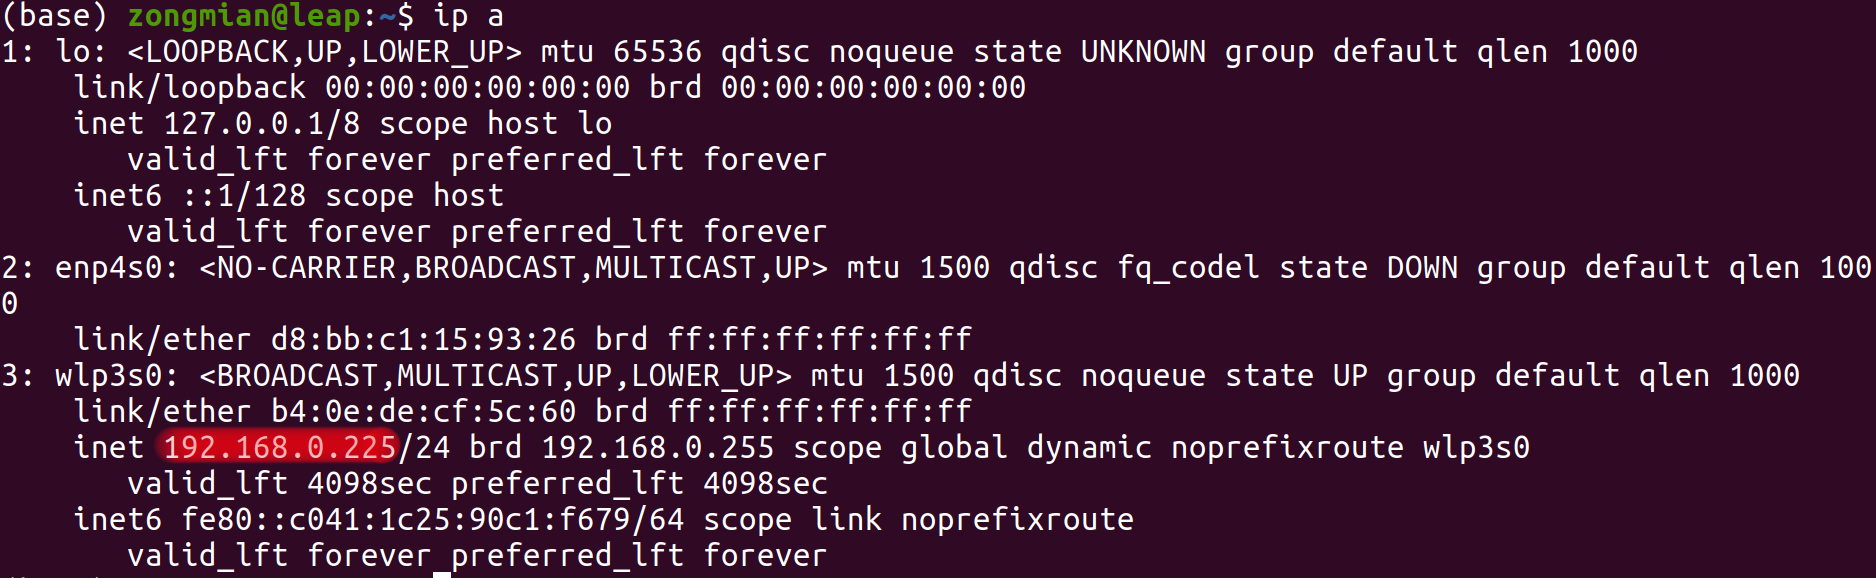
in which the private IP is highlighted in red.
Once you have configured the router, you can log in to the PC using:
1 | ssh <username>@<public_ip> |
in which the <public_ip> of the PC you are SSH-ing to can be found from https://api.ipify.org.
2.bis. Security issues
Running an SSH server on the Internet will put your remote machine at risk. If the remote server is a home PC, then you should apply some measurements to protect the server against bots and hackers:
- Change the config file in
/etc/ssh/sshd_config, for example:Remember to restart SSH after modification using1
2
3
4# Disable remote root login
PermitRootLogin no
# Disable password login (use SSH key-based authentication instead)
PasswordAuthentication no1
/etc/init.d/ssh restart
- Monitor regularly the SSH log using the command:
1
less -n /var/log/auth.log
- Monitor regularly who have connected to the your server with success:
1
who /var/log/wtmp
- White- or black-listing IP addresses using these files:
/etc/hosts.allowand/etc/hosts.deny.
3. Set up an SSH key-based authentication
To connect to the remote machine without a password, and also for security reasons, it is higly recommended to set up SSH key-based authentication. To do this, firstly check if an SSH key already exists on your local device since you don’t want to overwrite it. Try to print the public key:
1 | cat ~/.ssh/id_rsa.pub |
If No such file or directory then it’s safe to generate a new SSH key:
1 | ssh-keygen -t rsa -b 4096 -C "your_email@example.com" |
Now put the public key to the remote machine. There are multiple ways to do this:
- On the local device, type the command
ssh-copy-id <username>@<public_ip> - Or copy the contents of
~/.ssh/id_rsa.pubon the local device, and paste it to~/.ssh/authorized_keyson the remote machine.
4. SSH to the remote machine with port forwarding (aka SSH tunneling)
SSH port forwarding allows you to forward any TCP port on the local (ssh client) device to remote (ssh server) machine. This feature allows us to visualize from the local device the GUI of any Web browser based application running on the remote.
To enable SSH tunneling, pass the -L option each time you connect to the remote:
1 | ssh -L <local_port>:<remote_ip>:<remote_port> <username>@<public_ip> |
Here is a concrete example (with random ip and user name )
1 | ssh -L 7000:localhost:4000 foo@130.16.239.193 |
The above example forwards the port 7000 on the local device to the port 4000 on the remote machine. Any application rendering at http://localhost:4000/ on the remote can be found at http://localhost:7000/ on the local device.
You can forward any number of ports you want. Here is another concrete example of mine:
1 | ssh -L 7000:localhost:7000 -L 8888:localhost:8888 leap |
In this example, I am forwarding two ports, 7000 and 8888, between the local and the remote while connecting to my remote machine leap. The port 7000 is dedicated to Mashcat (a WebGL based 3D viewer) and the port 8888 is for Jupyter Lab (a Web brower based IDE for Python).
5. Work on the remote machine with terminal multiplexers
Remote processes running through SSH connection can be interrupted by Internet outage, SSH connection timeout, local device shut down, etc. Terminal multiplexers such as Tmux and GNU Screen are created to target this kind of problems. They can keep processes running in the remote machine when we disconnect from the session, letting us re-attach to it at a later time.
I’m giving an example workflow using Tmux:
1 | # SSH to the remote machine 'leap' with tunneling |
Open the url with a Web browser to have the GUI. Then you can type Ctrl-b d to detach from mysession.
1 | ... |
You can open more Tmux sessions for testing code. To re-attach previous session, type:
1 | tmux a |
For more commands visit Tmux Cheat Sheet & Quick Reference.